The Bamboo (or split cane) Fly rod.
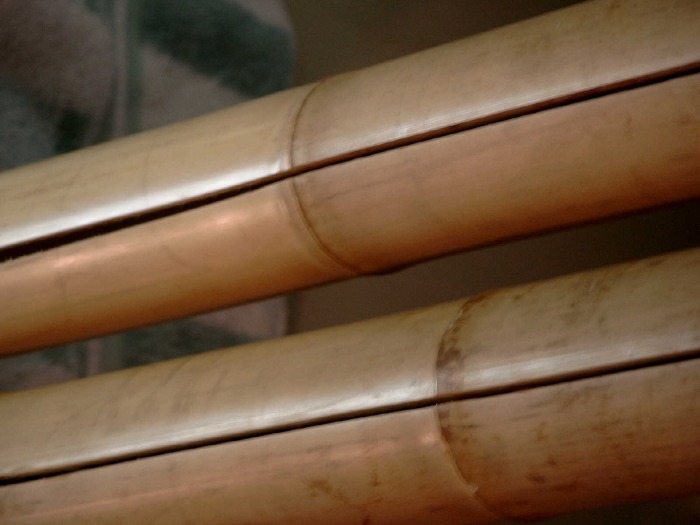
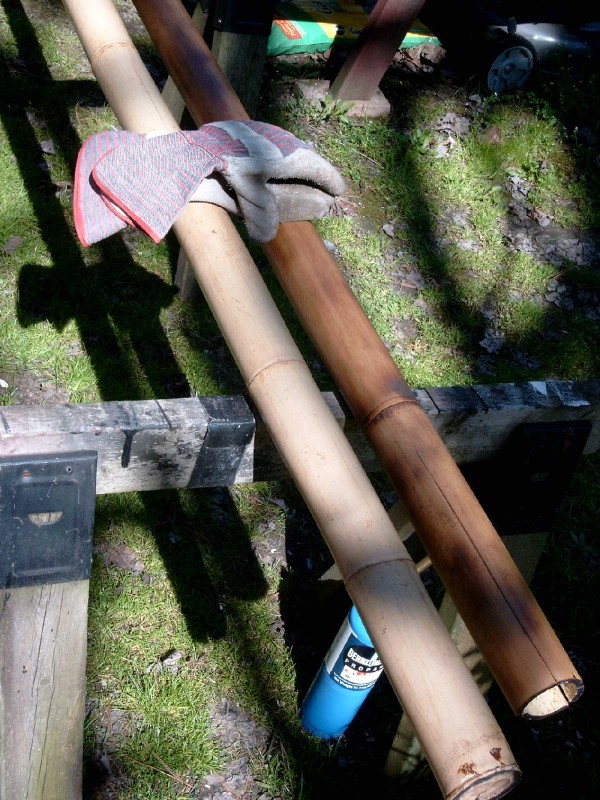
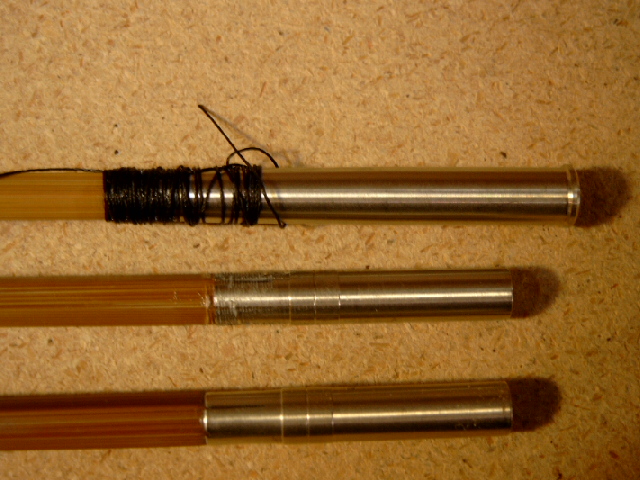
It all starts with a stalk, or culm, of Tonkin bamboo cut into two 6’ lengths. One will be the tip section of our rod, the other the butt. Each section is 1 ½” to 2” in diameter. I look for cane with few blemishes.Those stalks are then flamed-darkened with a torch to remove moisture and color the cane. This step is not necessary, though. If you choose to build a “blond” rod, then flaming won’t be done. Next, after the cane cools, it is split into strips. I start by splitting it into six strips, and then each of those is split again until we have a total of 18 butt & 24 tip strips. Each culm is marked butt & tip.
After the strips have been split, the rod you’re making is then “laid-out.” This means that the strips (you need 6 per rod section) are placed side by side. You then have to re-arrange the strips so that none of the nodes of the bamboo will be next to each other in the finished rod. After staggering the nodes, I then take into account how long each section should be and mark the strips to cut off the excess, leaving a couple of inches on either end of the strip. You cannot allow a node to be placed anywhere within 5 to 6” from the tip of the rod, or the ferrules. I should also mention that most bamboo fly rods come with two tip sections. So, in all, you’re making three rod sections.
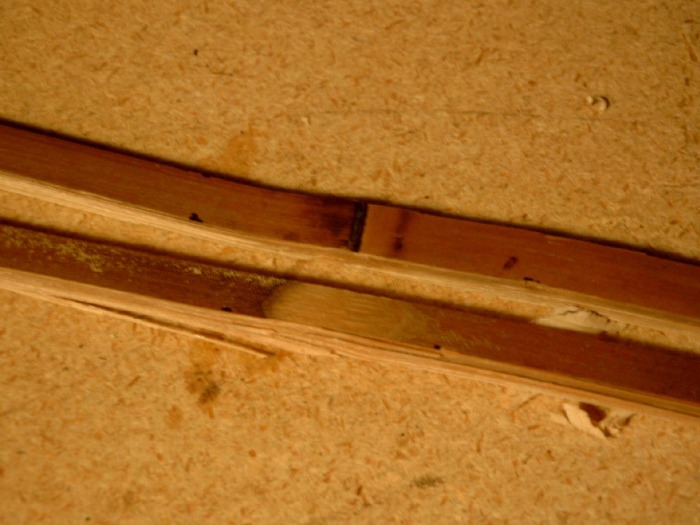
Next I square up the strips with a hand plane so they are fairly even on all sides down their length. Then the nodes are filed down flat to the top of the strip.
The next step is to straighten each strip by holding them over a heat source (heat gun, steaming tea kettle) and bending them straight by hand and also with a vise for really difficult kinks. This can take many hours of work, as nodes can be hard to work with. It takes a lot of patience to work with nodes. Some strips, after straightening, will relax back to their original curve and will need to be reworked. It has been said that nodes are Job’s gift to the rod maker. The end result should be strips that are straight over their entire length.
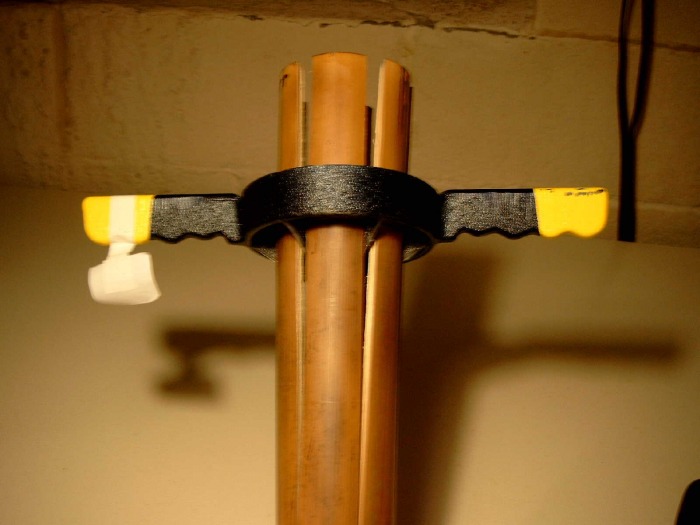
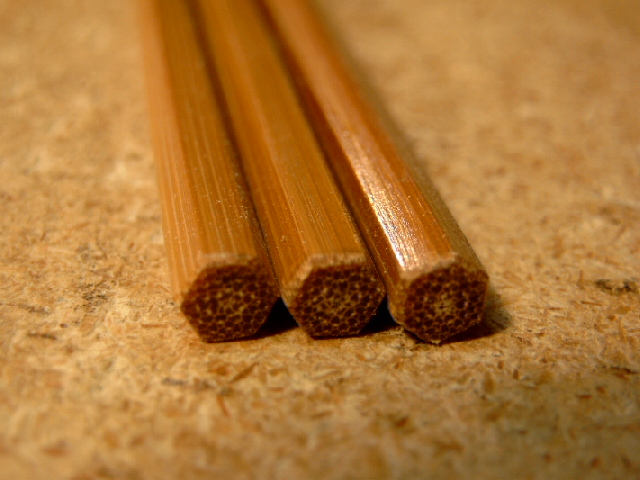
Now I take each strip and hand plane an un-tapered 30 degree angle on each side (except the enamel side – never plane the enamel side!) so that each strip is an equilateral triangle of 60 degrees. To accomplish this, the strips are placed into a planning form that is adjustable. The form is basically two bars with a 60 degree groove milled in between the two bars. This groove is tapered so that it is deeper on the butt end, and shallow on the tip end. I designed and built my own planning forms, binding machine, and other necessary tools for rod building and found the process to be educational and enjoyable.The tapered groove in the form and the adjustment bolts make it possible to set the size of the strip accurately down to 0.001”. After each strip receives the 60 deg bevel, and they are all uniform and exactly the same size, they are bound together and placed in a pipe oven and cooked at 200 to 350 degrees F for 15 to 30 minutes. This removes more moisture and helps to straighten them further.
When the strips have cooled from their time in the oven, they come out of the string they were bound in and are now ready to receive a taper, which will be hand planed into them. Back they go into the planning forms that have now been adjusted for the desired taper. It is always a good idea to do this step twice, making the first taper about 0.030” larger than the final taper. The reasons for this are many, but chief among them is the fact that making the first taper larger allows you to see if the cane has any bad spots in it. If any worm holes, rot, etc are found the strip must be discarded. Also, you will need to sand away the outer enamel of the bamboo strips which will happen after the first bevel is planed.
The taper of the rod is very important. It is the defining factor of the rods action, how it will cast, and how it will fish over all. Different tapers are designed to accomplish different things and this must be considered when building a rod. Along with line weight and rod length, the taper is the most crucial aspect of a rod. You must first consider where and how the rod will be used, what fish the rod will be used to pursue, and even who will be using the rod. Over the years many skilled rod makers have developed different tapers, some of them being more desirable than others over all. Still, choosing a rod is a personal decision for any angler, and people will find what tapers work best for them. There are hundreds, if not thousands, of tapers available to the rod maker today. The tapers are set into the planning forms by adjusting the bolts, and a dial indicator with a base used as a depth gauge. This is accurate to within 0.001”.
After the first bevel has been planed and the forms set for the final taper, the outer enamel is sanded off. This makes the strips flat on each side and makes the final planning more accurate. When all the strips have received the final taper you will now lay the strips flat, apply the proper glue, and bind all the strips together, thereby making the finished rod blank. Binding the strips together is best done with the aid of a binding machine. The strips are fed together through the binding machine by a drive belt, while binding string is wound around the blank as it passes through the machine. After the strips have made two passes through the machine (the string on the second pass is wound the opposite direction as the first to create equal tension) and the blanks are checked for straightness, the blanks are hung to allow the glue to set up.
When the glue has set up sufficiently, off comes the string from the rod blanks and excess glue is sanded off. This is the time to check the straightness of the blanks. No rod is ever perfectly straight, but you want a rod as close to straight as possible. Any curves or kinks must be taken out of the rod section by applying a soft heat and gently straightening by hand. This can take some time. Every now and then, you’ll get lucky and no straightening will be needed. When this happens, thank the universe and take a moment to enjoy your favorite beverage.
With the blanks straight and no glue remaining on the surface, sand the blanks down with finer and finer grits of sandpaper for finish. I usually like to end the sanding with 320 sand paper then go over them with 0000 steel wool. Then apply a thin coat of an oil based finish by hand to seal the blanks. Hang, and let dry.
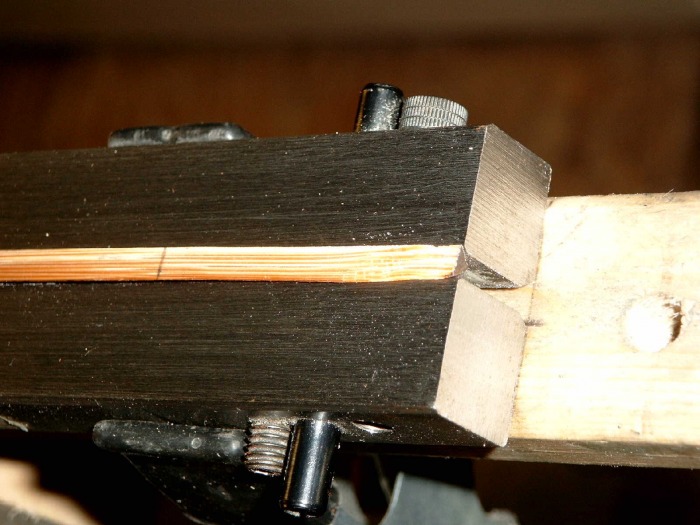
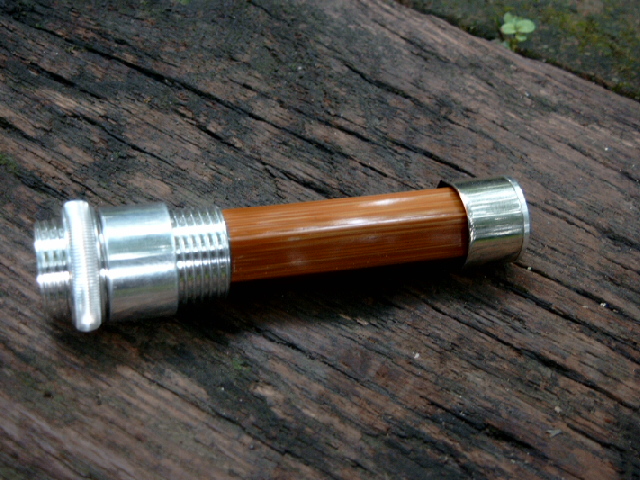
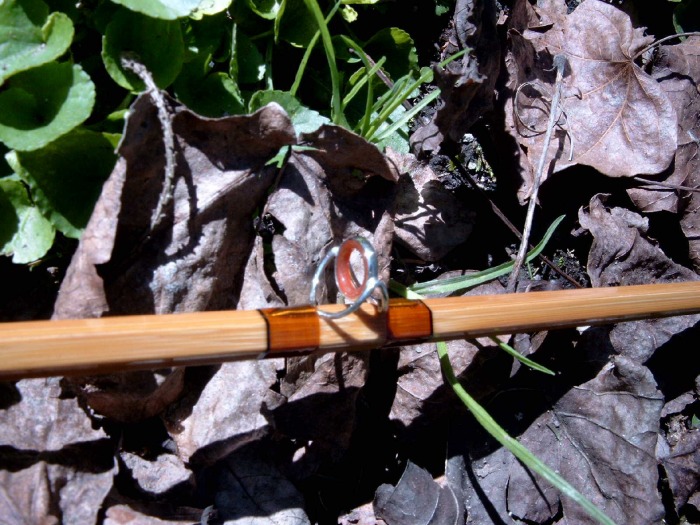
After the blanks are sealed, the ferrules are glued onto the blanks. Once on the rod, the ferrules must have the excess glue sanded off, and then the male ferrules must be lapped to fit into the female ferrule on the butt section of the rod. The ferrules are made of a nickel-silver alloy because it is durable and will not rust. When properly fitted, ferrules will slide together with ease and give a good “pop” when pulled apart. The ferrules – just like the rest of the rod – will last for generations if cared for properly. A well made split cane rod can be passed down through the family as an heirloom and still be functional. I can still fish with my Great Grandfather’s rod and I know of other anglers who can do the same.
Next I square up the strips with a hand plane so they are fairly even on all sides down their length. Then the nodes are filed down flat to the top of the strip.
The next step is to straighten each strip by holding them over a heat source (heat gun, steaming tea kettle) and bending them straight by hand and also with a vise for really difficult kinks. This can take many hours of work, as nodes can be hard to work with. It takes a lot of patience to work with nodes. Some strips, after straightening, will relax back to their original curve and will need to be reworked. It has been said that nodes are Job’s gift to the rod maker. The end result should be strips that are straight over their entire length.
Now I take each strip and hand plane an un-tapered 30 degree angle on each side (except the enamel side – never plane the enamel side!) so that each strip is an equilateral triangle of 60 degrees. To accomplish this, the strips are placed into a planning form that is adjustable. The form is basically two bars with a 60 degree groove milled in between the two bars. This groove is tapered so that it is deeper on the butt end, and shallow on the tip end. I designed and built my own planning forms, binding machine, and other necessary tools for rod building and found the process to be educational and enjoyable.The tapered groove in the form and the adjustment bolts make it possible to set the size of the strip accurately down to 0.001”. After each strip receives the 60 deg bevel, and they are all uniform and exactly the same size, they are bound together and placed in a pipe oven and cooked at 200 to 350 degrees F for 15 to 30 minutes. This removes more moisture and helps to straighten them further.
When the strips have cooled from their time in the oven, they come out of the string they were bound in and are now ready to receive a taper, which will be hand planed into them. Back they go into the planning forms that have now been adjusted for the desired taper. It is always a good idea to do this step twice, making the first taper about 0.030” larger than the final taper. The reasons for this are many, but chief among them is the fact that making the first taper larger allows you to see if the cane has any bad spots in it. If any worm holes, rot, etc are found the strip must be discarded. Also, you will need to sand away the outer enamel of the bamboo strips which will happen after the first bevel is planed.
The taper of the rod is very important. It is the defining factor of the rods action, how it will cast, and how it will fish over all. Different tapers are designed to accomplish different things and this must be considered when building a rod. Along with line weight and rod length, the taper is the most crucial aspect of a rod. You must first consider where and how the rod will be used, what fish the rod will be used to pursue, and even who will be using the rod. Over the years many skilled rod makers have developed different tapers, some of them being more desirable than others over all. Still, choosing a rod is a personal decision for any angler, and people will find what tapers work best for them. There are hundreds, if not thousands, of tapers available to the rod maker today. The tapers are set into the planning forms by adjusting the bolts, and a dial indicator with a base used as a depth gauge. This is accurate to within 0.001”.
After the first bevel has been planed and the forms set for the final taper, the outer enamel is sanded off. This makes the strips flat on each side and makes the final planning more accurate. When all the strips have received the final taper you will now lay the strips flat, apply the proper glue, and bind all the strips together, thereby making the finished rod blank. Binding the strips together is best done with the aid of a binding machine. The strips are fed together through the binding machine by a drive belt, while binding string is wound around the blank as it passes through the machine. After the strips have made two passes through the machine (the string on the second pass is wound the opposite direction as the first to create equal tension) and the blanks are checked for straightness, the blanks are hung to allow the glue to set up.
When the glue has set up sufficiently, off comes the string from the rod blanks and excess glue is sanded off. This is the time to check the straightness of the blanks. No rod is ever perfectly straight, but you want a rod as close to straight as possible. Any curves or kinks must be taken out of the rod section by applying a soft heat and gently straightening by hand. This can take some time. Every now and then, you’ll get lucky and no straightening will be needed. When this happens, thank the universe and take a moment to enjoy your favorite beverage.
With the blanks straight and no glue remaining on the surface, sand the blanks down with finer and finer grits of sandpaper for finish. I usually like to end the sanding with 320 sand paper then go over them with 0000 steel wool. Then apply a thin coat of an oil based finish by hand to seal the blanks. Hang, and let dry.
After the blanks are sealed, the ferrules are glued onto the blanks. Once on the rod, the ferrules must have the excess glue sanded off, and then the male ferrules must be lapped to fit into the female ferrule on the butt section of the rod. The ferrules are made of a nickel-silver alloy because it is durable and will not rust. When properly fitted, ferrules will slide together with ease and give a good “pop” when pulled apart. The ferrules – just like the rest of the rod – will last for generations if cared for properly. A well made split cane rod can be passed down through the family as an heirloom and still be functional. I can still fish with my Great Grandfather’s rod and I know of other anglers who can do the same.
Some rod makers prefer to place all the components on a rod (reel seat, handle, guides, etc) and then dip their rods in a tank of varnish. Others prefer to completely varnish the blank only, and then apply the components, following a method similar to making graphite rods. I follow the latter method. I don’t dip my rods. This is just a personal preference. I pour many coats of varnish over the blanks then assemble the rod later.
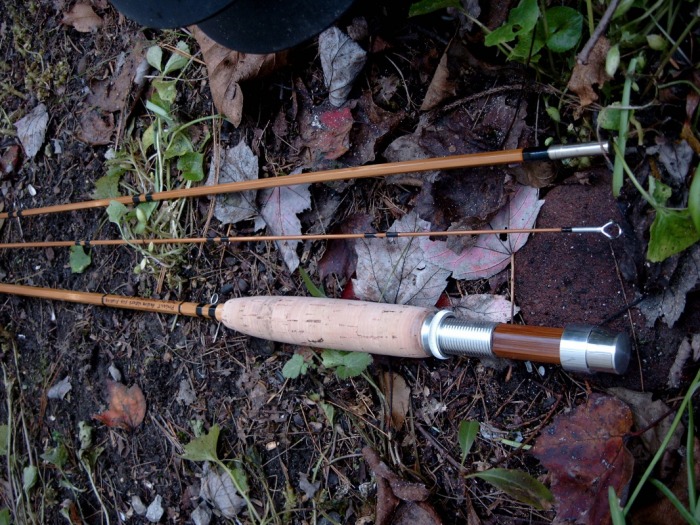
As the blanks are being finished and dried, I assemble all the other parts for the rod. I make, by hand, most of the line guides, cork handle, -and in some cases- the reel seat. Cork grips are made by gluing cork rings together, and then turning down, or sanding, the rings into the desired shape of the handle while it is turning in a lathe. Reel seats are usually made from wood and incorporate slide rings or a threaded tube to hold the reel to a rod. Sometimes I substitute bamboo for the wood in the real seat. This is just an example of the many unique and personal touches a rod maker can give to a rod.
Now that the blank is finished and the ferrules are on and lapped in, the next thing to do is to glue the handle and reel seat onto the blank. Now it is beginning to look like a fly rod. Then we place the line guides up the length of the rod. The feet of these guides are wrapped to the rod using the finest diameter silk thread available. This will give the wraps a smooth and beautiful look. The silk wraps are then given 3 to 5 coats of a high quality varnish. Under the varnish the silk becomes transparent, showing the guide feet and bamboo – a very desirable effect.

Rods can be up graded with things like an agate stripping guide (the guide closest to the handle of a fly rod). This is a guide cut from natural agate stone and held in a nickel-silver ring. Other features that can be added also include a feather inlay. This is a nice touch to a fly rod and when done properly, will look as though the feathers have been painted on the rod.
It can take over one hundred hours of work to make a split cane fly rod from start to finish. The process of building these rods are much the same as they were 150 years ago. The reward for the labor is a fly rod that is truly unique and will perform better than one that has been mass produced in a factory half way around the world by people you’ll never even meet. The tools are simple and few: a micrometer, calipers, block plane, files, etc; and so are the methods. Fly rods made of modern synthetic materials can be quite beautiful, intricate fishing tools and have a place in any angler’s collection. Custom built synthetic rods should in no way be scoffed at by bamboo aficionados. However, a bamboo rod speaks of tradition and a slower pace of life in a sport rich with tradition. Casting a bamboo fly rod is as timeless as fly fishing itself and upon using one many anglers never use a synthetic rod again. Yes, bamboo rods can be that good!
It can take over one hundred hours of work to make a split cane fly rod from start to finish. The process of building these rods are much the same as they were 150 years ago. The reward for the labor is a fly rod that is truly unique and will perform better than one that has been mass produced in a factory half way around the world by people you’ll never even meet. The tools are simple and few: a micrometer, calipers, block plane, files, etc; and so are the methods. Fly rods made of modern synthetic materials can be quite beautiful, intricate fishing tools and have a place in any angler’s collection. Custom built synthetic rods should in no way be scoffed at by bamboo aficionados. However, a bamboo rod speaks of tradition and a slower pace of life in a sport rich with tradition. Casting a bamboo fly rod is as timeless as fly fishing itself and upon using one many anglers never use a synthetic rod again. Yes, bamboo rods can be that good!

To read more about my rod making philosophy, click HERE.
©2010 - 2024 Chris Lantzy, Custom Rod Maker
