The following article about my recent adventures in rod design is a bit technical & in depth. If you're interested in the nuts & bolts of bamboo fly rod tapers, read on......
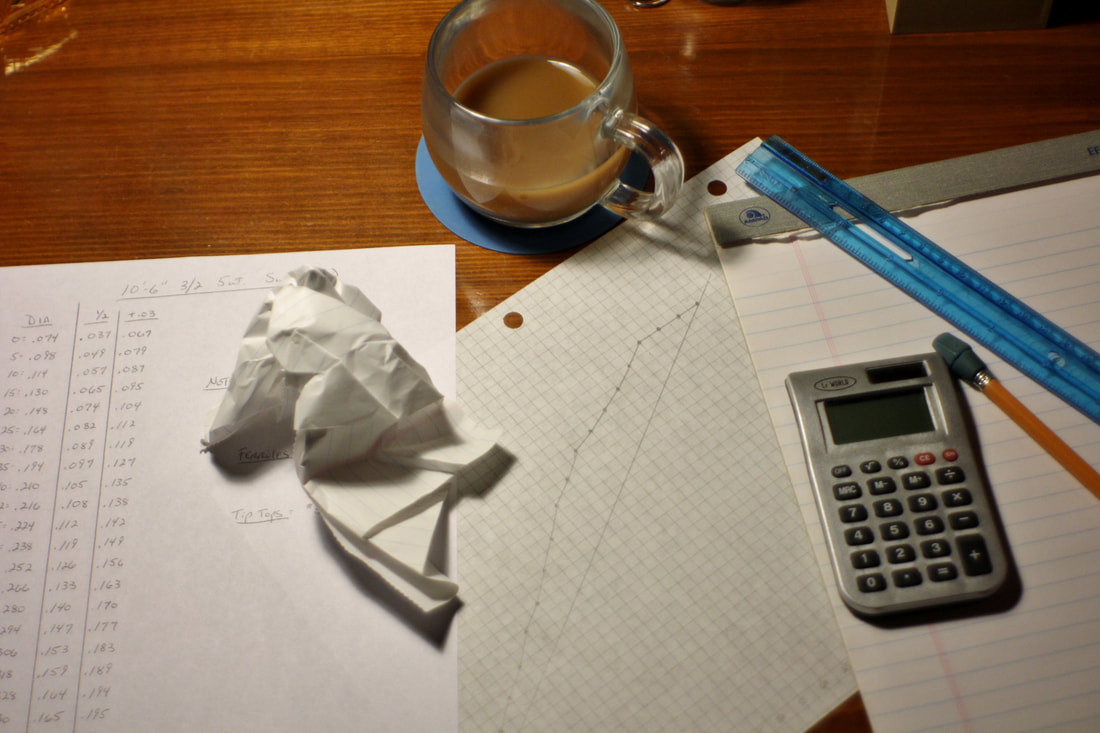
Being a custom rod maker has a unique set of challenges. In making a custom bamboo fly rod for an angler, you need to first know what type of rod will best serve them in terms of action, feel, length, line weight, etc for their particular situation. As a result, you need to know all about how rod tapers work (the actual dimensions of the rod’s shafts, or the thicknesses of the rod up & down its length). Through the years there have been many different rod tapers tried & made - some good, some not so good, & a few dozen great ones.
It’s only practical to take the old tried & true rod tapers which have stood the test of time & use them in making your own rods today. You can adjust them as needed in small amounts here & there to get precisely the rod you’re after, but mostly you'll stick to the taper as it stands. This is like a chef making only small adjustments to a well known recipe. The more experience you have in making rods the more you’ll understand different rod tapers; what the numbers on the paper mean in a real life fly bamboo fly rod.
When my friend, James, brought me an idea of making him a bamboo fly rod for a 4 or 5 wt line I didn’t think too much about it. He mentioned the length of 10 ft to 11 ft & I still didn’t bat an eye, though I should have. Then he told me that what he wanted was a bamboo ‘switch’ rod. Sure, no problem, right? Well, hold on a second….. In my personal experience I’ve made bamboo rods mostly for trout (the vast majority of them), for bass, & some ultra-light fly rods. I’ve made a few all-out salmon rods, too but you can count all of those I’ve made on one hand. As I began to consider this rod, I realized there were some design hurdles ahead for me.
For the uninitiated, a ‘switch’ rod is one that is intended to bridge the gap between a large salmon, or Spey, rod & a regular fly rod. They can be cast either one handed, the typical way a fly rod is cast or with both hands as a salmon rod would be. Furthermore, a switch rod needs to cast a line as far as possible with the least amount of effort from the angler. Switch rods tend to made in lengths of 10 ft to 12 ft & have a front & rear grip on them, just lie a salmon rod. A good switch rod will perform like a single-handed rod when fishing in the typical fashion with one hand, while it will also feel like a short Spey rod when casting with two hands. You see, a switch rod isn’t just a small Spey rod.
Because this rod was going to be 10’-6” long & made for a 5 weight line, this presented a challenge. Bamboo is a heavier material than graphite or fiberglass. If we compared two identical rods with the same outside diameter of their rod shafts - one bamboo & the other graphite - the bamboo rod would be much heavier. Typically that extra weight is a benefit for bamboo as you can feel the rod load & unload during casting & if it’s designed properly it will be a smooth casting rod. However, the longer we make the rod the more bamboo there will be. That means that a longer bamboo rod (on average) will be heavier than a shorter one. When we start getting into lengths of over 9 ft it becomes more difficult to design a rod taper that will feel natural with a 4 or 5 wt line. The rod will be too heavy in overall weight for those fly lines. That’s why you don’t see many 9 ft bamboo fly rods made for 3 or 4 wt lines. In trying to create a 10’-6” rod for a 5 wt line I realized I would be in a bit of uncharted territory, at least for me.
Another way to see this problem would be take this example: let’s say I wanted a ridiculous bamboo fly rod that was 14 ft long & made for a 3 weight line. If I made the tip of this rod the normal diameter for a 3 wt line & made the butt of the rod for a 3 wt line as well, I don’t have much variation in the the rod’s diameter down it’s length. I’ve got all this distance to cover, but I can’t vary the diameter too much or it won’t be a 3 wt anymore. What kind of action would that rod have? It would be awful, not to mention that it’s bound to have a bunch of weak spots along the length of it. Because I wanted this rod to cast a 5 wt line one handed like a normal 5 wt should, I knew I had some thinking to do.
I came up with a bunch of different taper designs along the way. I decided on a 3 piece rod configuration, as this would make it much easier for me to figure out the rod taper, how each section would work together, & those sections wouldn’t be too long for transporting the rod. I eventually settled on a rod design that would have a stiffer tip & put the bulk of the flex into the mid section. I made the butt section a bit beefier than a normal 5 wt, but got around the problem of extra weight by hollowing it out (removing material from the apex of each individual strip before the strips were glued together to form the butt section’s rod shaft). This hollowing of the butt section helped to reduce the overall weight of the rod as well.
Try, try again.
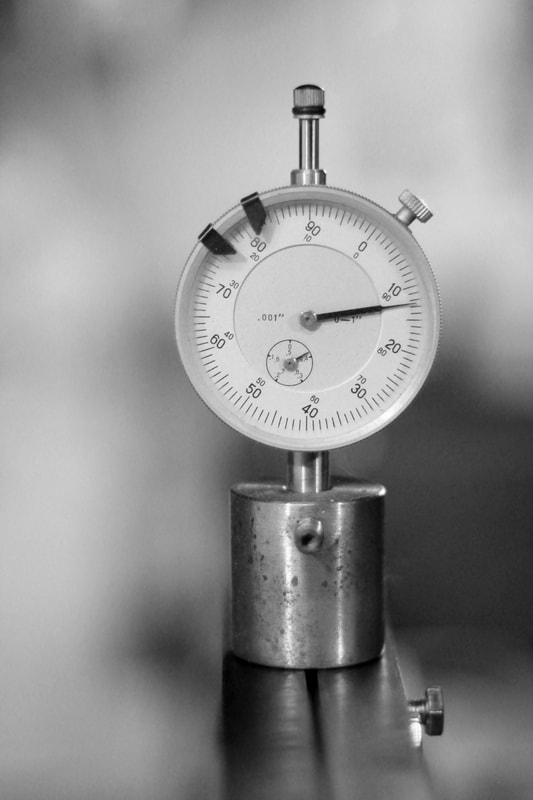
With my brand new rod taper I made up some rod sections on the planing forms in the shop & glued them together. After mounting up some test ferrules & taping some line guides on, I was ready to see my creation come to life. This was getting exciting! After going through some vigorous lawn casting tests with the rod, I could see right away that I had a problem. The tip & butt sections were fine, but the rod was flexing way too much in the middle. It had no backbone & felt weak. I’m not the best caster in the world (not even close) but a mediocre fly caster like me should be able to get the line out further than I could with this rod. Okay, back to the drawing board - at least for the mid section.
I couldn’t figure it out. Every combination of diameters I came up with for the mid just wouldn’t work. When I got to the point where I was considering changing ferrule sizes, I threw my hands up in the air! My design problems were now creating problems of their own & I was going in circles. I knew I had to be making this harder than it really was, but how? That’s when I had my best idea for this rod up to that point: I took the time to watch people casting switch rods. Pros, beginners, & every skill level in between - I watch videos of folks casting switch rods for quite a while (isn’t the internet great?). Never mind that they were all fishing with graphite switch rods, I wanted to see how these rods flexed, how they moved through the casting stroke, & how the fly line reacted. I slowed the videos down, paused them at key spots in a cast & studied how the rods were flexed & bent.
This was time well spent. I then knew what I had to do to fix the middle section of this fly rod. I beefed the taper of the mid section up in the appropriate spots on paper & made a new section in the rod shop. After mounting the test ferrules & line guides again onto the new section I took the rod out for another test drive. This time it worked as I had envisioned. All three rod sections worked in concert to cast the line with little effort.
Setting the rod's dimensions on the planing forms.
A brief description of this rod’s taper: The tip section was stiffer (or faster) & didn’t flex too much. The bulk of the flexing was in the middle section. This was to give the rod power when James needed to get the line out some distances, yet maintain finesse when say, tossing dry flies in smaller places. The butt section was made a bit beefier for those times when he might tie into a monster that was too much for just the middle section. Because the tip was a bit stiffer, it had less to do with the action of the rod, so (in theory) James could use a bunch of different lines on this rod. He might be happy with a regular 5 or 6 weight line, or he could use a Scandinavian head on smaller fish & streams, or he might rig it up with a skagit set up with a good front anchor for some bigger rivers. This seemed like it could be a pretty versatile rod that might be fished in a bunch of different places…….like a switch rod should be.
Now, I know the rod won’t be all things everywhere - no rod is perfect for all fishing - but I wasn’t worried too much about that. James is a very skilled & knowledgeable angler & an experienced fly rod caster. He’d have no problems making any adjustments he needed & he’d know exactly which line he wanted to use & where to use the different lines. Honestly, had it been someone without the experience that James has, I would have probably insisted that they go with a graphite switch rod just because there were times when I felt I was in over my head designing this rod taper.
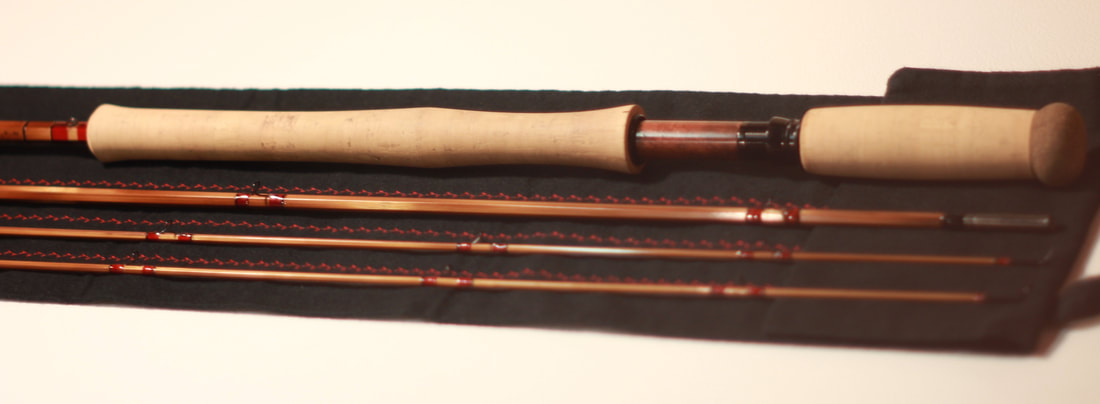
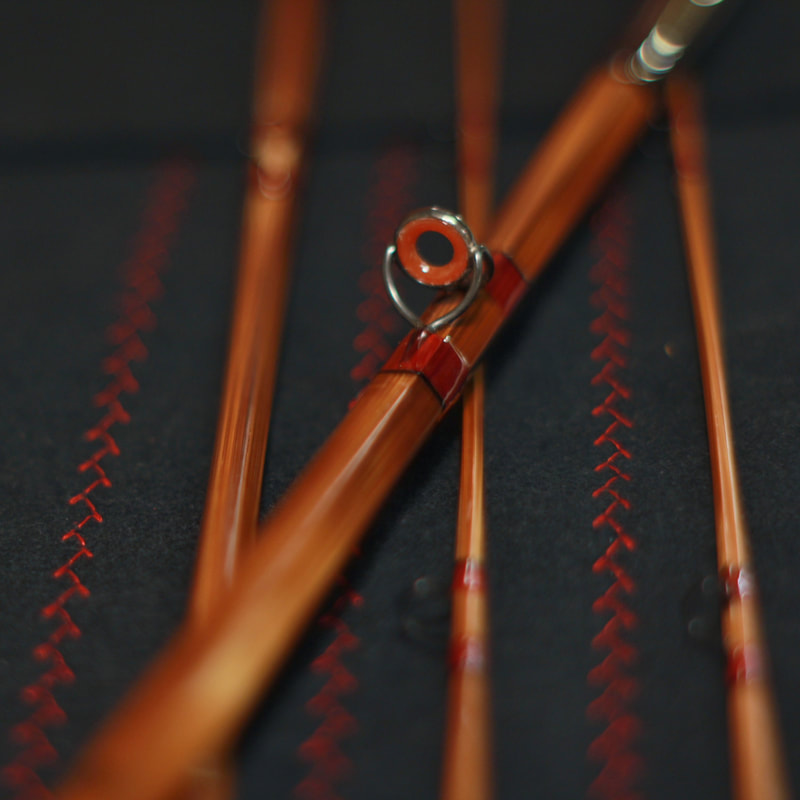
I finished out the rod with the cosmetics that James wanted, which were gorgeous: black line guides, blued Nickel-Silver ferrules, red silk thread wraps tipped in black, a red agate stripping guide, & gorgeous Amboyna burl wood in the reel seat. This was truly a special rod.
Now, I know the rod won’t be all things everywhere - no rod is perfect for all fishing - but I wasn’t worried too much about that. James is a very skilled & knowledgeable angler & an experienced fly rod caster. He’d have no problems making any adjustments he needed & he’d know exactly which line he wanted to use & where to use the different lines. Honestly, had it been someone without the experience that James has, I would have probably insisted that they go with a graphite switch rod just because there were times when I felt I was in over my head designing this rod taper.
I finished out the rod with the cosmetics that James wanted, which were gorgeous: black line guides, blued Nickel-Silver ferrules, red silk thread wraps tipped in black, a red agate stripping guide, & gorgeous Amboyna burl wood in the reel seat. This was truly a special rod.
In the end I had a blast creating & making this rod. Yes, it was frustrating & a real challenge at times. There were moments of doubt where I wasn’t sure I could do it. That said, I loved every moment of it. It really got me thinking & out of my comfort zone. After 14+ years of making fly rods for others everyday, I realized I had become too complacent with rod tapers. In the past I had a tendency to ignore some of the lesser know rod tapers that were for longer rods - mostly because they are heavier rods made for heavier fly lines & not good for most trout fishing on small to medium sized streams. Now, after this project, I’m taking another look at these longer rods. Could they be made lighter, for thinner fly lines? Could I make a 9 ft, or longer, bamboo fly rod for say, a 3 or 4 wt line that was light in the hand & well balanced? A rod like that would be great for tossing dry flies up stream on small trout waters. I have so many possibilities running through my mind. It feels great!!!
I want to sincerely thank Mr. James Wong for bringing this rod project to me. I’m honored that he chose & trusted me to make his fly rod. I thank him, also, for his very kind patience with me as I made this rod. I can only hope that he’ll have as much fun fishing with this rod as I did making it. Thank you, James!!


 RSS Feed
